
How to Keep Your Cutting and Charcuterie Boards Looking Perfect
The 5-step routine I use on every board that leaves my shop, with the exact products and timing.
I build cutting boards and charcuterie boards out of walnut, maple, cherry, and just about every premium hardwood you can think of. I put 15 to 20 hours into each one, and I have a simple rule: if it touches food, I will not finish it with anything I would not put in my own body. That said, there are solid commercial board oils that work well and cost less, so I will cover those too.
My shop process before a board ever leaves the door
When a customer tells me their board cracked six months in, nine times out of ten the wood did not fail. The care did. Somebody put it in the dishwasher, let it soak in the sink, or just never oiled it.
The routine below takes about five minutes a week. It is the same process I use on my own boards at home and the same one I recommend to every customer. Five steps, a handful of products, and your board will look as good in five years as it does right now.
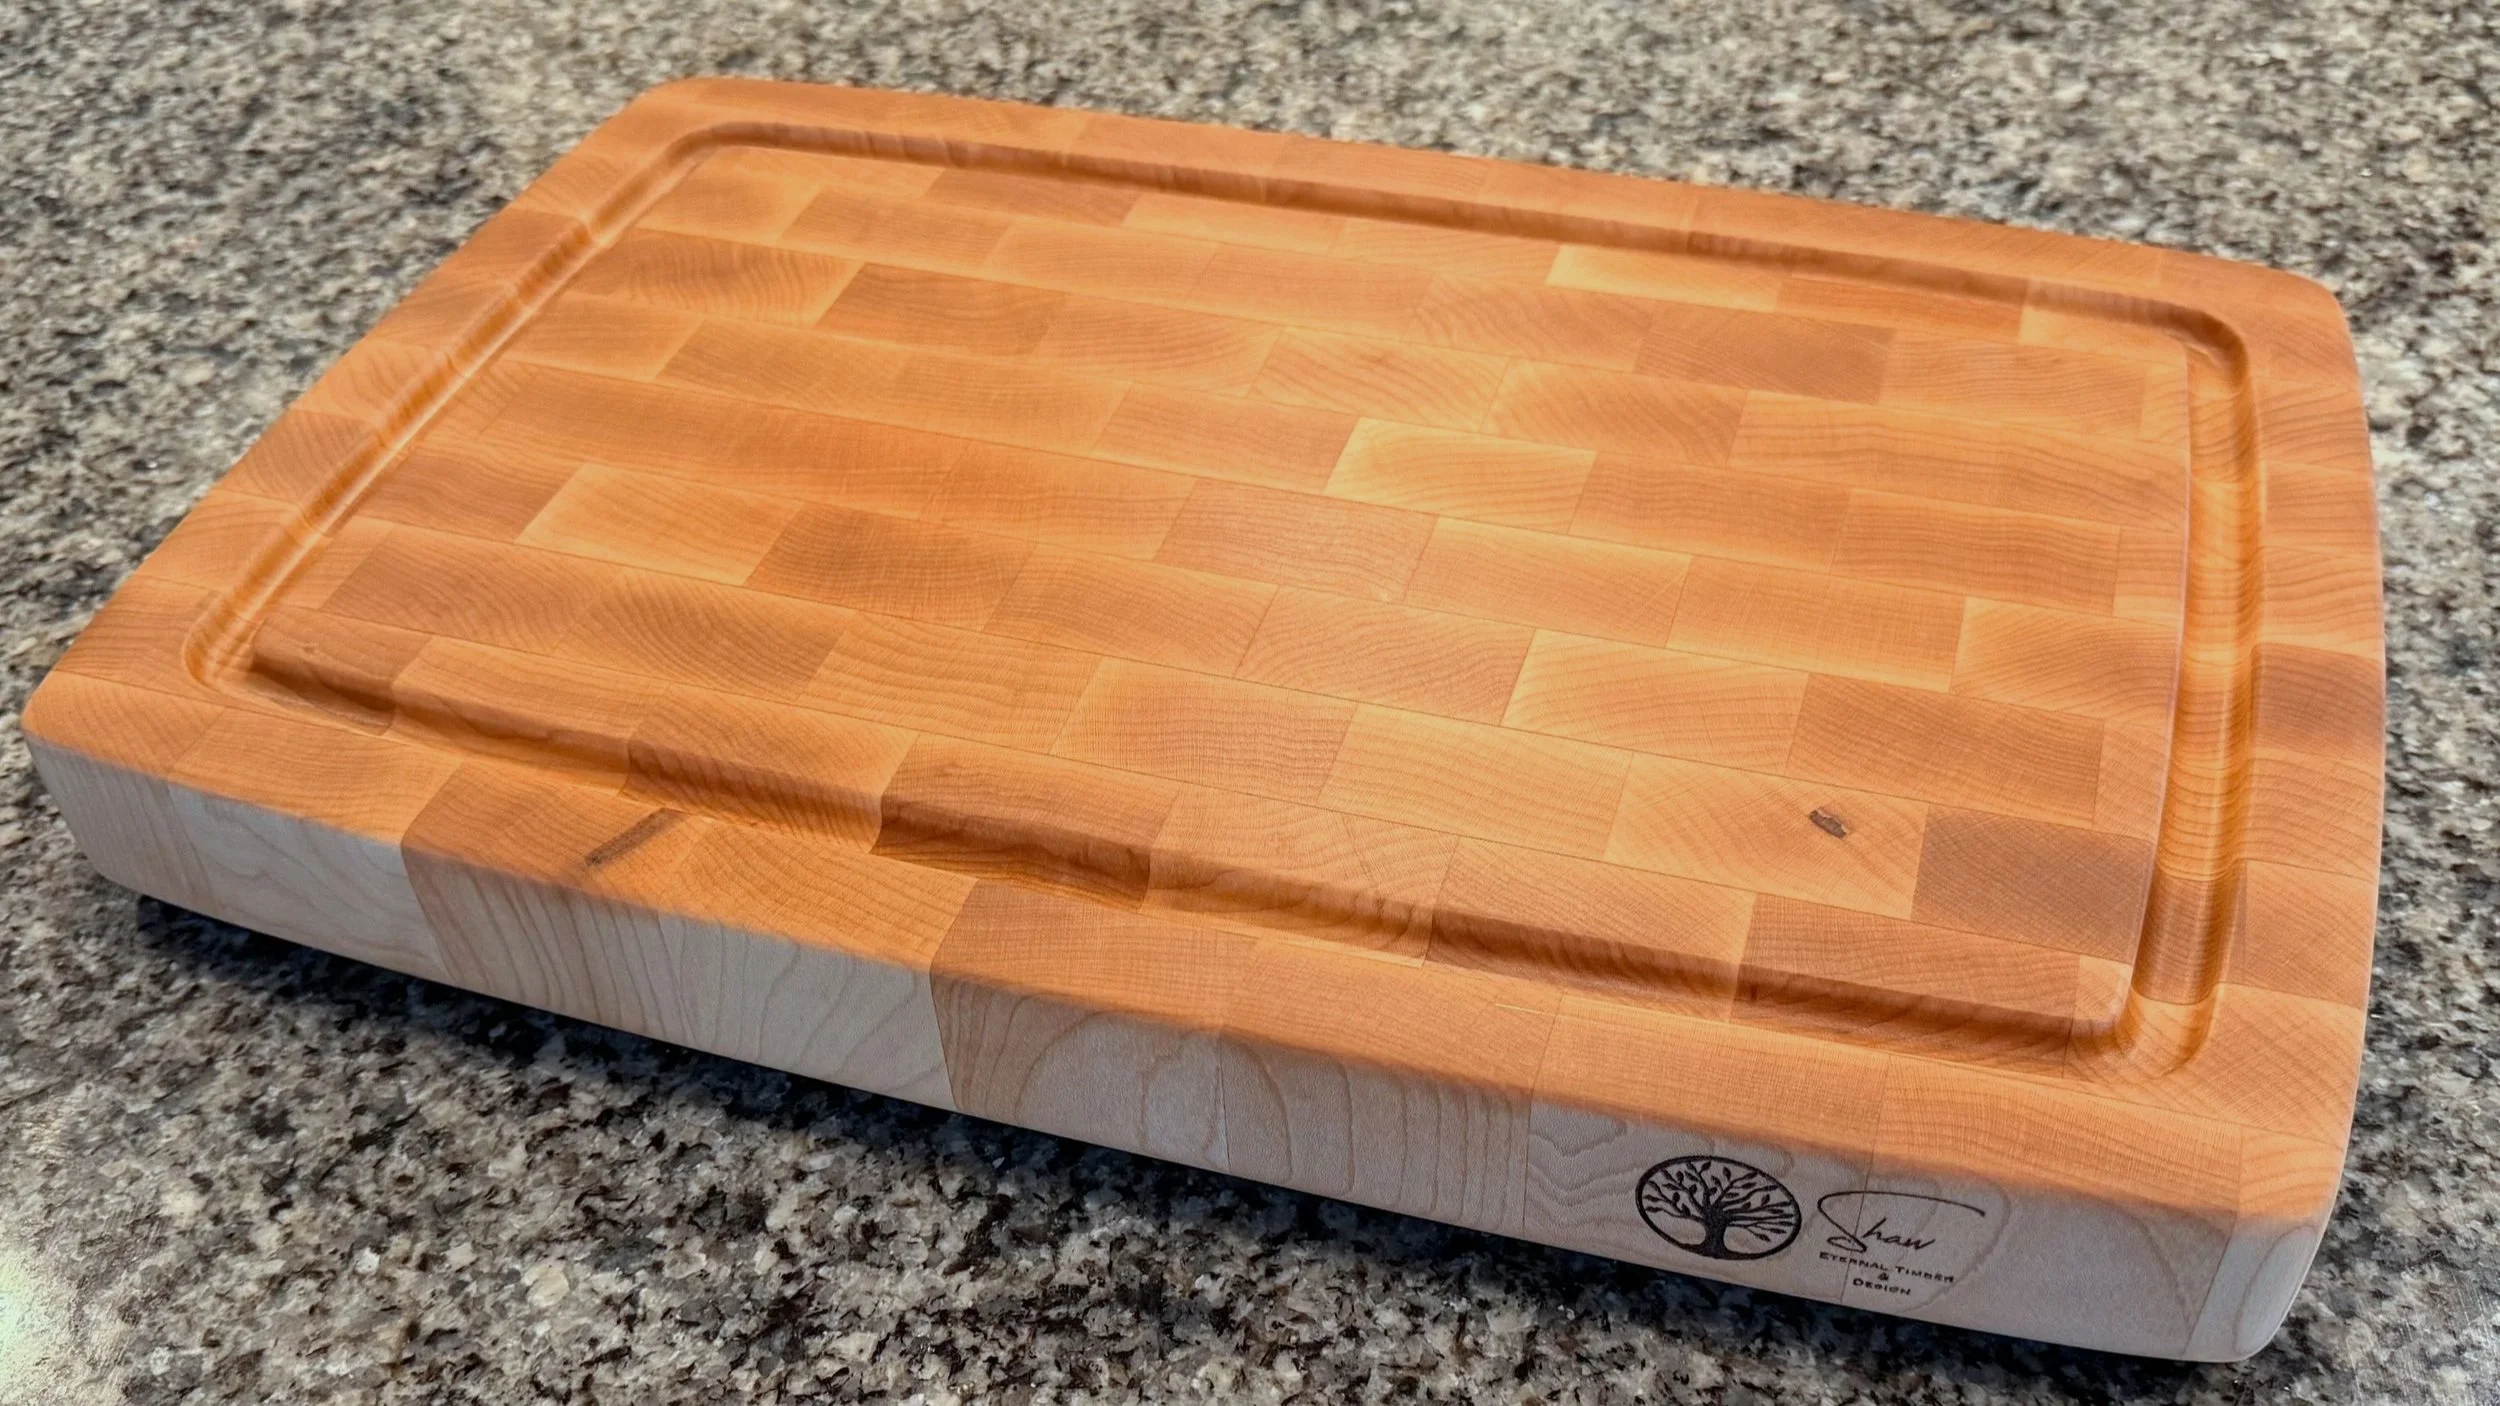
Custom maple end-grain cutting board with feet on the countertop
Step 1: Wipe It Down After Every Use
Grab a damp microfiber cloth and wipe the board down after every use. You are removing crumbs, oils, and food residue before they have a chance to stain or soak in. I keep a dedicated pack in the kitchen drawer. They pick up everything without scratching, and you can throw them in the wash. Do not use abrasive scrub pads or steel wool.
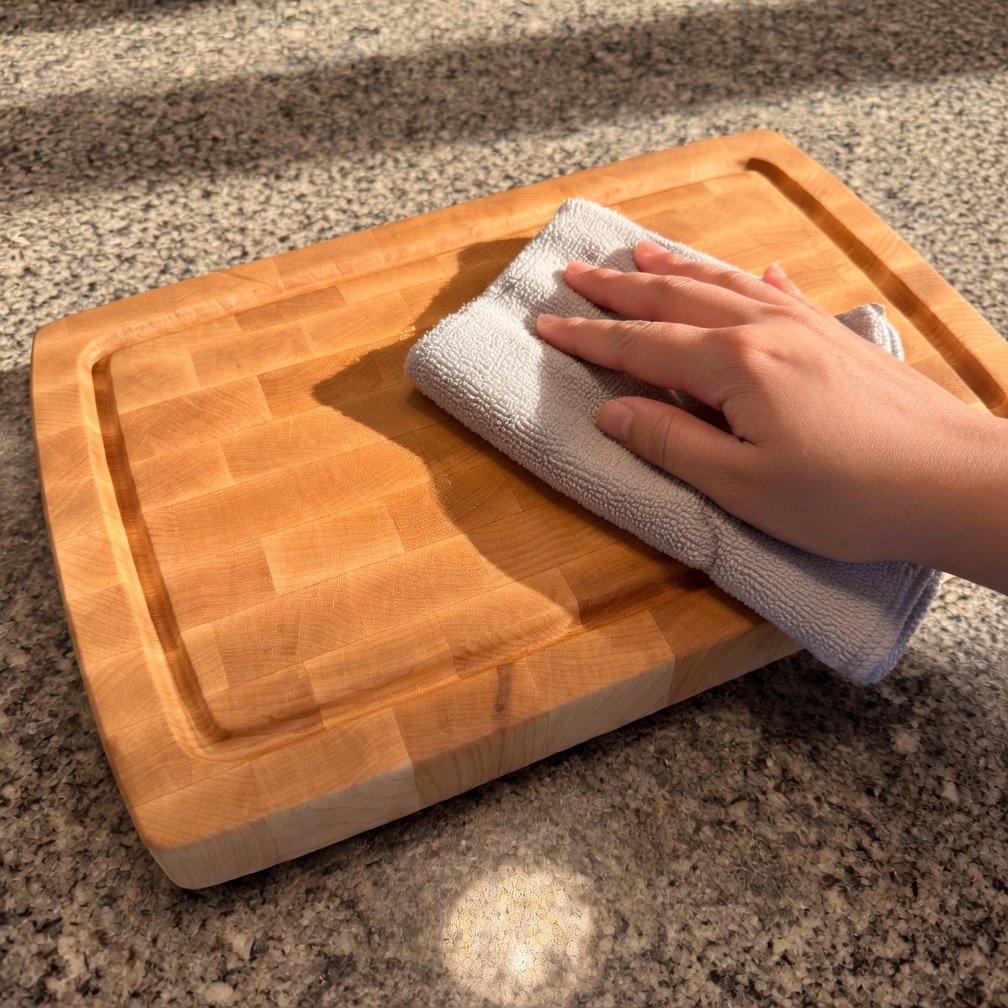
Wiping a walnut cutting board with a microfiber cloth
Step 2: Wash When You Need To
Not every use requires soap. But when you have been cutting raw meat, handling anything greasy, or the board just needs more than a wipe, use a little mild dish soap on a soft sponge with warm water. Wash it the same way you would wash a plate. Rinse it off and move straight to Step 3.
Salt & Lemon Board Scrub
- Sprinkle a generous layer of coarse kosher salt across the surface
- Cut a lemon in half and rub it over the salt, squeezing gently as you go
- Let it sit for 2 to 3 minutes
- Rinse with warm water and dry immediately
The salt works as a gentle abrasive, the lemon juice sanitizes naturally, and it smells great. No chemicals touching your food surface.
"You should never cut raw meat on a wood cutting board."
UC Davis researchers tested Salmonella, E. coli, and Listeria on both materials. Bacteria that soak into wood die quickly. On plastic, they sit on the surface and multiply, especially in knife scars. The USDA had no science behind their recommendation to use plastic over wood. Still wash with soap after raw meat, same as any surface.
Source: Dean O. Cliver, Ph.D., UC Davis Food Safety Laboratory
Step 3: Dry Immediately, Every Time
Towel it off right away, then stand the board on its edge so it dries evenly on all sides. If your board has feet, it can lay flat since air already circulates underneath. If it does not, do not leave it flat on the counter with water pooling underneath. Trapped moisture is the number one cause of warping. A $200 handcrafted walnut board becomes a wobbly cutting surface because someone left it flat on a wet counter overnight.
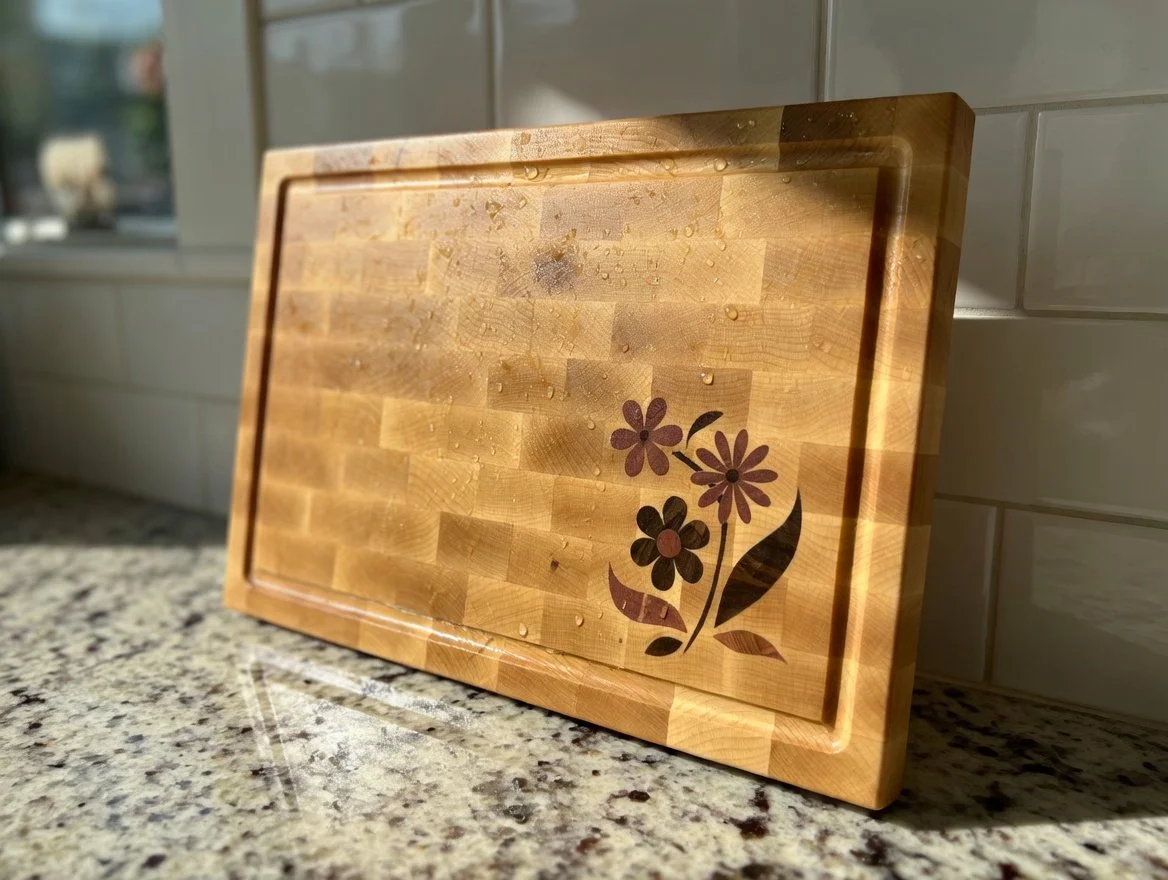
Maple inlay cutting board standing on edge to dry after washing
Step 4: Oil When the Wood Looks Dry
Wood is a natural material and it dries out over time, especially in heated kitchens with low humidity. When the surface starts looking dull, feels rough instead of smooth, or the color looks washed out, it is time to oil.
I use the same fractionated coconut oil for maintenance that I use for the initial finish in my shop. Pour it on generously and let the wood drink as much as it wants, usually 20 to 30 minutes depending on how dry the board is. Wipe off everything the wood did not absorb with a clean cloth and let it sit overnight.
Step 5: Wax for Extra Protection
After oiling, I follow up with a wax coat. For boards used daily, every two to three weeks. For lighter use, once a month keeps it in top shape.
DIY Coconut Oil + Beeswax Blend
- Fractionated coconut oil
- Organic beeswax pellets
- Melt at 3:1 oil-to-wax ratio
- Cool to a paste, buff into the board
- 100% food safe, two ingredients
- Same finish I use in my shop
Walrus Oil (Ready to Go)
- Cutting Board Oil + Wood Wax
- Pour, spread, wipe off
- Food safe, absorbs evenly
- No mixing, no melting
- Gets you 90% of the way there
- Best commercial option I have found
My blend of coconut oil and beeswax - only available locally
Will warp, crack, and potentially split your board in a single cycle. I have seen $300 boards destroyed in one wash. This is the most important thing in this entire post.
The grain swells unevenly. When it dries, it contracts unevenly. That is how cracks start.
Strip the oil finish and dry out the wood. Stick to mild soap or the salt and lemon method.
Scorch the finish and leave permanent burn marks. Your board has one job and being a trivet is not it.
Light sanding with 220-grit sandpaper, with the grain, then re-oil and wax. Five minutes.
That Is the Whole Routine
Look, I know none of us need one more thing to manage in our lives. So rest easy. As long as you keep it dry and do not let food sit on there for hours, just wipe it off right away, your board is still probably going to outlive you. If you spent $500 on one and you want to leave it in your will for your grandkids someday, wax and oil it regularly. Otherwise, do the basics and enjoy it.
The products listed below are the exact same ones I use in my own kitchen on boards I built with my own hands. If you want the full list of tools, finishes, and products I recommend, check out my Favorites page.